Thursday, March 21, 2019

Our Blog Is Moving!!

Best Light Photo BLOG New At Wordpress.com


Hello everyone!

We have loved using the Blogger site for hosting our Best Light Photographic BLOG for many years.

Times have changed and we thought it time for a refresh.

To that end, we have converted all the posts here over to a Wordpress.com site.  This will be the final post here, but we will be leaving this site up and running.

Many links to posts here are out on the web, so we do not want to break those.

So, from here forward, please use the links at the top of this post as well as the one below to go to the new site.

If you are following us via RSS Feed, make sure to go to the new site and update your reader!

So you all on the other side!!

Best Light Photo BLOG New At Wordpress.com


Friday, February 22, 2019

Olympus 9mm f/8 BCL Review

© Olympus Europe


Background

Sometimes things are just so inexpensive and different that you need to experiment.  This was the case with the Olympus 9mm f/8 Body Cap Lens (BCL).

Retailing at just $99, you may not think much of this "lens", which Olympus officially has listed in their catalog as an accessory.   Along with the 9mm, Olympus also makes a 15mm BCL.  Others that have reviewed them both state that the 9mm is the better of the 2.

Let's find out how it performs.

1/160, f/8, ISO 200
Olympus PEN-F

Handling/Size/Weight

This is tiny.  Barely sticking out from the camera body at all.  It is made of plastic so it weights next to nothing as well.

This is a constant/fixed f/8 aperture lens so there is no aperture adjustment or aperture ring to contend with.

There is honestly not a lot to say about this lens.

1/500, f/8, ISO 200
Olympus EM1 Mark II


Weather Sealed

Not on this guy!  This is an all plastic body cap lens.

1/100, f/8, ISO 250
Olympus EM-5 Mark I


Image Quality

Let's level set.  This is not going to be the sharpest lens in the tool kit.   However, this lens is actually better than you'd expect it to be.

You are already starting out at f/8 so you have a ton of depth from front to back of your image.   Sharpness is actually pretty good considering.

This is a fisheye lens too, so expect that kind of rendering and distortion in the final image.

1/60, f/8, ISO 2500
Olympus EM-5 Mark I

1/100, f/8, ISO 1250
Olympus EM1 Mark II

1/100, f/8, ISO 2000
Olympus EM1 Mark II

1/640, f/8, ISO 200
Olympus PEN-F


Focusing

Focusing is done via a 4 position lever at the bottom/front of the lens.  Position 1 is closed and protects the lens element.   The next 3 progressive positions are for close focus, middle focus(where it is probably used the most) and infinity focus.

I found that the lever was easily bumped from position, so if using this lens, be careful to ensure that the lever stays in your intended position.


VR/IBIS - Lens or Body Stabilization

This is an m43 lens, so it can take advantage of the IBIS (in body image stabilization).

Bottom Line

This is not going to be your go to, everyday lens.  What it can be is a fun experiment or a special occasion lens that gives you  something different.  Being f/8 it really works best when there is ample light, but with m43 IBIS or putting it on a tripod for low light - you can still get some good images in those situations.

While $100 might not be worth it to you new, you can find these used for half that or less.

Wednesday, February 20, 2019

Smallrig L-Bracket for Nikon Z6 Review

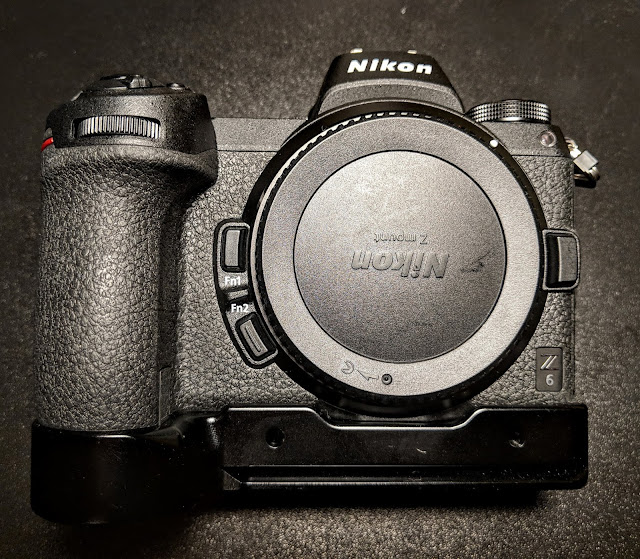
front view of the bottom plate.  The 2 screw holes are for an accessory bracket that can support the FTZ adapter.  This bracket is sold separately.

Extra gripping and camera protection have been on my mind here lately.  There are a lot of options out there of varying degree - quality, price, materials.  So many that it can be daunting.

What I have been doing is analyzing what it is I need and going in that direction.  For the Olympus PEN-F, I've just wanted something to protect the bottom plate from getting scratched up, same as the Nikon Df.  The Nikon Z6 was slightly different in that I wanted to have something that would add a little more vertical grip to the camera.

Final decisions were made on that basis.
 
How will the Smallrig L-Bracket perform?

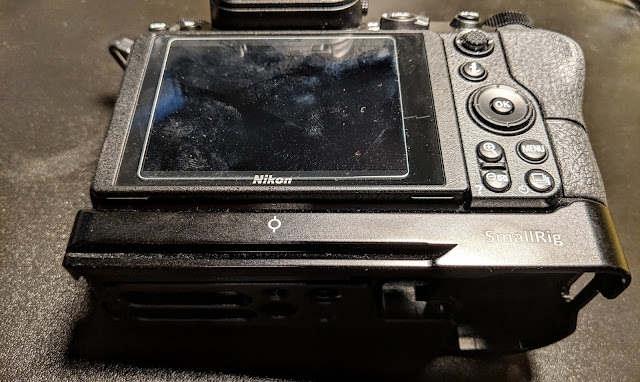
Bottom rear showing the arca swiss ridge and centering indicator


First Impression/Unboxing

Even though the Nikon Z series mirrorless cameras have not been out for that long, there are quite a few l-brackets out there for it.  Most l-brackets are about the ability to connect the camera to an Arca Swiss compatible tripod head.  What I wanted for the Z6 is to add a little extra vertical grip to it.   A lot of the top makers left this area off, more than likely to cut down on weight that would be added to have metal across the entire bottom of the camera.

That omission is the reason a lot of the more well known brands were removed from consideration.

Price was also a factor, as the other brands also were, in some cases double the price or more and some were not even tailored to the camera, they were more the universal type.

Not only did I need the extra grip, I had a requirement that the battery compartment be open and not obstructed.

At $69, the Smallrig l-bracket for Nikon Z hit all the marks on paper.  The problem was that no one local had one. Smallrig's reputation is good online and their camera cages and other l-brackets get good reviews as well.  I decided to take the chance.

I ordered from Smallrig, located in China.  The item was listed as back-ordered.   Within a few days, though the item had shipped via FedEx and I received the item within 3 days after item marked as shipped.  Impressive!

I received a small non-descript brown box.  Opening the box, you get a pamphlet from Smallrig as well as the l-bracket, wrapped up very well in 2 layers of bubble wrap.

The fit and finish is excellent.  There is not a blemish on this thing.  It is solid feeling well worth the asking price.

bottom, you can see additional tapped slots for connecting standard tripod attachments or in my case a BlackRapid ConnectR.  You can also see the allen wrench at the bottom as well.


Installation

Smallrig includes an allen wrench with the l-bracket.  Not only that, but the bottom plate houses the wrench and holds it in place via a magnet system.  Very clever.

Before installing, I removed the side bracket.  I didn't want that part, only the bottom plate.  I wasn't sure if the side bracket was removable, so I did inquire about this via email to Smallrig before the order.  They very quickly responded and informed me that the side bracket is indeed removable.

Using the supplied screw and allen wrench, the bottom plate was installed quickly and easily.    It couldn't be any easier than this - which I'm sure every l-bracket is probably just as easy.

this is the area where the side plate of the l-bracket should be


Feel In Hand

Every edge is smooth, not a rough edge anywhere.  The bracket gives plenty of distance for your pinkie to rest on it without falling off the edge.

I really do not notice any additional weight either.

This things is darn near perfect!  It is 100% what I wanted.

It also gives plenty of clearance for the FTZ adapter.  In actuality, the bottom of the adapter does not touch the table top when the Smallrig is installed.

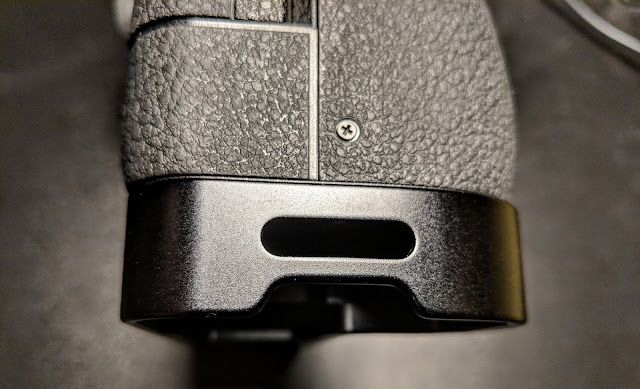
grip side.  Looks like some kind of lanyard or strap slot perhaps?


Final Thoughts

I will start out by saying that I will definitely be looking to Smallrig in the future if I ever need/want another l-bracket or camera cage.

This stuff is quality all around and the prices good.  Customer service is top notch.  I would not hesitate to recommend Smallrig products in the future.

If there are any additional questions about the product, drop a comment below and we can discuss.

Tuesday, January 22, 2019

Gariz Half Case For Nikon Df


I've really been seeing the benefit of l-brackets and half cases lately.  I originally got my first half case for the Olympus PEN-F, reviewed on this site previously.    Then, after getting the Nikon Z6, I needed a little more vertical grip and bottom protection so snagged a Smallrig l-bracket for it.  Review of that setup can be found here on this site soon.

I did try a half case, the Kinokoo brand from Amazon for the Z6 but it fell short of expectations.  A full review of that can be found here on this site, coming soon.

I saw the reviews and sample images of the Gariz, but wasn't sure if the $114 retail cost was going to be worth it.   The PEN-F case for $14 was an incredible value and the Smallrig l-bracket was $70 and the Kinokoo was $20.

I did a little hunting around the web and found that the Gariz half case for the Nikon Df was available used from Adorama.  Total cost, shipped was $50.

I noticed that there was some brassing of the bottom plate on the Df, so I wanted to get something to protect it.  I did not have a grip issue on the Df, so that was not a major consideration.
   
How will the Gariz half case fair?  Is it worth the $114 price tag at full retail?


First Impression/Unboxing

Being used, the Gariz did not come in the original packaging that I;very heard described elsewhere.  Adorama did package the half case in 2 layers of bubble wrap and shrink wrapped plastic.

Removing it from the packaging, the leather on the it looked in perfect condition as does the interior felt like material.  The only sign of use was some small scratches and imperfections on the bottom aluminum plate.

The build quality seemed top notch upon first inspection.


Installation

This is a very simple operation.  Just line up the tripod mount hole at the bottom of the camera with the half case and screw in.  No special tools needed because the connecting bolt has a connected handle for tightening it down.  Just in front of the connecting bolt is another 3/8" screw hole for connecting to a tripod or other such accessories.


Feel In Hand

The fit and finish are just great.  The case slides on and is snug around all connects points.

The feel of the case is solid and natural in the hand.

The issue I had with the Kinokoo case on the Nikon Z6 was the grip area.  It protruded out too much.  Made holding the camera feel weird.  The Gariz case does nothing have that issue on the Df.  It enhances the feel of the camera and that is a welcome thing.

The bottom is similar to the Minico half case for the Olympus PEN-F.  There is a door at the bottom that allows access to the battery compartment and SD card.

It is a little more difficult to extract the memory card, but not the battery.


Final Thoughts

I definitely appreciate the protection and feel that the Gariz half case provides.  If we look at the question posed from the beginning, which was "is the case worth $114USD?"  Well, this is one of the best half cases I've come across.  I'm not sure that you could find a better one for the Df.  I didn't really want an l-bracket for it.

I think the MSRP is probably double what I would want to pay new.  $75 seems more right to me.
I'm glad I found this half case at the used price I did.   If a half case is what you want, I can highly recommend this one.  I'll leave it up to you to decide if the price is worth it to you.