Showing posts with label lightroom. Show all posts

Thursday, November 8, 2018

Lightroom Enhancement - Behringer X-Touch Mini + MIDI2LR

image © musictribe.com/Behringer

With the relatively recent releases of the Loupedeck devices, my interest was piqued to see if something like this would indeed enhance the develop module workflow in Lightroom.

The original Loupedeck and software comes in at around $179, while the newer Loupedeck + device and software is $250.

What does this device do, exactly?  Well, it is an alternative control that allows Lightroom modifications and controls through dials and switches instead of using a mouse and slider controls.

I was a bit skeptical at first, so as I normally do - I hit research mode.   I watched YouTube videos of people using and setting up the Loupedeck devices.  I could definitely see the value in it.   What I could also see was related videos about Loupedeck alternatives.

OK, I'm intrigued.  Basically for $50, you can get a similar device with free software to do something similar.  Digging deeper into that side of the research brought us to the Behringer X-Touch Mini USB MIDI controller board and the MIDI2LR open source software.

For a $50 investment, I figured it was worth the gamble.

An Amazon Prime order and 2 days later, the X-Touch Mini is delivered.

Installation:

All the drivers for the X-Touch Mini are built into the device, so plugging it into my Windows 10 PC, had it connected, recognized and ready for use within seconds.  I even went and checked the Behringer website to see if there were any newer drivers.  No, on that.

Next I went to the GITHUB site for MIDI2LR and downloaded it.  I did some research on what it would take to get this up and running.   A lot of the instructions out there seem to be a lot older than the version of software that is out there as of now.  There is a proper installer and all I needed to do was download the EXE file and run it.   MIDI2LR installed the plugins to the proper directories.   I then just went into Lightroom and made sure that it was in the plug-in manager.

Sure enough, it was there.   There were also some instructions that showed the need to start and stop the MIDI2LR server.  This automatically starts and stops when I run Lightroom, so no need to do anything else.

image © musictribe.com/Behringer
Full Board

Setup:

Setup for the board is plug and play, no need to do anything else than have it plugged into the USB port.
MIDI2LR will need some initial setup.  You can either find a profile XML file on the internet to start with or setup the buttons on the X-Touch yourself.  I chose to setup the buttons myself.

With the MIDI2LR interface running, the board plugged in...press a button on the board and it is highlighted in the panel.  From there, you click the button and select what you want to assign to that button or dial.

Here is how I setup my board initially:

image © musictribe.com/Behringer
Row Of Dials

DIALS

(all dials can be clicked down as well, and those are setup to do a RESET to that dials function)
Bank A
#1 - Exposure
#2 - Contrast
#3 - Highlight
#4 - Shadow
#5 - White
#6 - Black
#7 - Vibrance
#8 - Clarity

Bank B
#1 - Sharpening Amount
#2 - Sharpening Detail
#3 - Sharpening Masking
#4 - Luminance Noise Reduction
#5 - Color Noise Reduction
#6 - Dehaze
#7 - Vignette
#8 - WB/Temperature


image © musictribe.com/Behringer
Button Row 1 and 2

BUTTONS

Row 1/Bank A  (these are my custom built presets)
#1 - Preset 1 = APSC/FF Basic
#2 - Preset 2 = APSC/FF Hi ISO
#3 - Preset 3 = Nikon RAW
#4 - Preset 4 = Olympus Basic
#5 - Preset 5 = Olympus Hi ISO
#6 - Preset 6 = Olympus RAW
#7 - Preset 7 = CellPhone
#8 - Preset 8 = B&W Finisher

Row 2/Bank A
#1 - before/after toggle (MC)
#2 - copy develop settings
#3 - Previous Image (<<)
#4 - Next Image (>>)
#5 - Before/After (loop)
#6 - Auto Transform ([])
#7 - Show Crop (>)
#8 - Add to quick collection (record symbol)

Row 1/Bank B
#1 - currently unmapped
#2 - currently unmapped
#3 - currently unmapped
#4 - currently unmapped
#5 - currently unmapped
#6 - currently unmapped
#7 - currently unmapped
#8 - currently unmapped

Row 2/Bank B
#1 - create virtual copy (MC)
#2 - paste develop settings
#3 - 3 Stars (<<)
#4 - 5 Stars (>>)
#5 - currently unmapped
#6 - currently unmapped
#7 - Export (>)
#8 - currently unmapped
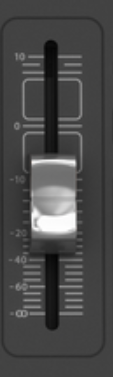
image © musictribe.com/Behringer
non-powered fader


Fader dial is not used because it is not motorized.  The other dials and buttons are capable of taking on the value they are assigned to in Lightroom.  You'll notice this when you switch images.  The lights around the dials will change to match the value setting on the commands they are mapped.

image © musictribe.com/Behringer
Layer A/B Buttons


The layer buttons found on the far right are the selections between the 2 different banks.

Once you have the buttons setup, you can save it as a profile that is loaded every time the MIDI2LR program is started.

The board is completely USB powered, so only one cord is needed for connections.  I've seen some ingenious YouTube videos where people have connected a small power bank and bluetooth device to it, allowing for it to be used sans wire.

image © musictribe.com/Behringer
side view showing USB port

I'll probably change around some of the button assignments in the future to better suite my workflow, putting the most used buttons and dials on layer A, then using the backup functions on layer B.

Here is my board, labeled using the Brother P-Touch PT-H110 label maker:


That brings me to the benefit I see of using the Behringer over the Loupedeck.  While it is nice to have the buttons pre-labeled on the Loupedeck device - they are pretty much stuck there.  I've heard you can re-program them with the provided program.  I'd much rather have blank buttons like on the Behringer and use a label maker.

The downside is that the MIDI2LR software is open source and the developer could stop supporting it at any time.  To a lesser degree, the same thing could hold true for Loupedeck, if the product doesn't take off the company could abandon it.

It just seemed to me that the $50 investment at this time was a better choice.

So, we've talked a lot setup and hypothetical.  What about this thing in action?
So far, I've only used it to edit and post process a handful of photo shoots.  I did not have my label maker right away and during that time, I was not always hitting the right dial or button every time, but I did not have any time lost versus just using the keyboard and mouse.

With that being said, once I use it for a bit longer, I definitely see me getting through a set of images faster.  I really only need to look at the histogram on the right side.  The dials go right to it and work excellent.

One small change I've done that is different from my old workflow is turn on the visual clipping indicator in the histogram.  This makes clipped blacks glow in blue and clipped highlights glow in red.  This makes using the black/white/highlight/shadow adjustments quicker.

All I know right now is that this is fun to use, easy to setup and inexpensive enough to have taken a chance on.  It will decrease my time in front of the computer when doing culling and post processing tasks.  That alone is going to recoup the $50 spent.   I'm even going to donate some money to the developer for the effort.   It is well worth it!

Monday, August 21, 2017

American Monster Photo Shoot

Nikon D700 / Nikon 24-70/2.8 / Nikon SB-28
1/320, f/5.6, ISO 400 @70mmgridded speed light just below camera on lens axis

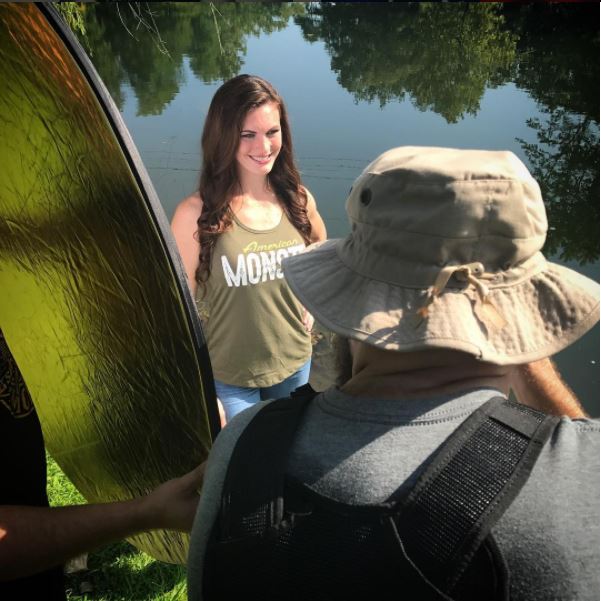
It's always a pleasure when you get to work with great people.  Working with Derrick Smith from American Monster has been a pleasure for us.  BLP was asked to come in and get some marketing photos for social media and the company website.

I thought I'd take you through the process.

Derrick had been familiar with my work from other events that we've shot like editorial work from the Arnold Fitness Expo, our portrait work and street photography.  

Derrick already had the models in mind he wanted to use, so that was not something that BLP needed to do.    That is not always the case, as there are times when the client has a vision, but no models.  If the models had not already been procured by American Monster, we could have used places like Model Mayhem or reached out on social media to find the talent.

Just wanted to give a shout out to the models:

Josh and Amanda Salley, Kyle Smith and Jeramy Weiss.

Image © Derrick Smith / American Monster
We met a few times prior to the shoot to discuss what we wanted to achieve as the end goal.  Derrick is a great photographer and videographer in his own right, but he decided that he would much rather hand the reigns over to me to get the shots and he would take on the role of the artistic director for the shoot.   At the pre shoot meetings, the goal was to get some environmental portraits and scenes, not too posed or staged...with a bit of an edge to them without looking over processed or cartoony.   A hint of grit and grunge, if you will.

Image © Derrick Smith  /  American Monster
Location is important, and there were 2 for this shoot.  The first being an outdoor oasis, just a 25 minute drive from our home location.   We had farmland, pond, open fields...a lot to choose from.   The second location was inside a gym.

So, we have the theme, the location....now we need to determine how we are going to get the look we want.

Image © Derrick Smith / American Monster
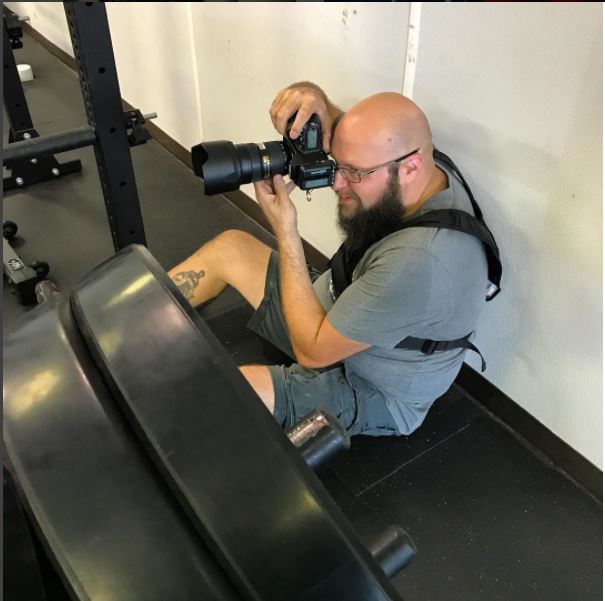
Sometimes you gotta put your back against the wall and get low.

Going back to my office, I think about how I want to do it.   Shooting is going to start at 9am, so we still have a good directional light.  If we are backlit, we will want to have some fill light - better bring the off camera flash!    I don't want a soft light, though - so I'm thinking bare light, grids or even a ring light type effect.

Image © Derrick Smith / American Monster
Use what is available to you.  Create a large softbox by bouncing off the back wall and ceiling!
With that tight of a flash beam, though, I'm thinking 2 lights - one key light for the subject and one auxiliary light source for the apparel logos.    Reflectors too...bringing those...they are invaluable!!

Here is the gear list for those interested:
Nikon D500
Nikon D700
Nikon 24-70/2.8 AF-S
Tamron 70-200/2.8 VC
Tokina 11-16/2.8
Nikon 18-140/3.5-5.6 AF-S VR
Nikon SB-26 and SB-28
2 light stands
Opteka 1/4" and 1/8" honeycomb grids
RadioPopper TX/RX (Nano) wireless trigger system
Frio Cold Shoes
Interfit 5-1 fold up reflector/diffuser

Post processing is something I highly believe in.   Some people feel that straight out of camera is the way to go.  If I were shooting a news piece or editorial work, then I'd leave them largely untouched.  In this shoot, we are looking for not only a representation of the products, but also a style to the images.

99% of my post workflow is done in Lightroom.   I also use some plug-ins from On1 and Nik.

My flow goes as follows:
1)  Run all the images through my Nikon Lightroom preset as a base.
2)  Spot check each image to tweak the exposures
3)  Do any cropping I might deem desirable.
4)  Run the images through On1 Effect 2017 (these color images were run through the "Kryptonite" preset and then tweaked)
5)  For select images, I may also run them through a monochrome processing.  For those, I used Nik Silver Efex Pro "film noir harsh" or the On1 Effects 2017 black and white presets of "Kodak Panatomic 32" or "City Streets" - and as always, tweak as necessary.

Luckily, all these tools have a batch processing features so I don't have to touch each and every one.

First thing I do once on location is start scouting for shooting locations.  The property is expansive, but the first thing that hits my eye is this tree with small leaves and  that "weeping willow" style branches.  Sorry to the tree people out there - I don't know the names of my trees very well.  lol.  The morning sun is hitting it in such a way that it is providing a great backdrop that will make the clothing the models are wearing stand out.  

An expansive pond with lots of interesting props all around can be used as well...then we have the farm-esque side of the property with the iconic white fence, red barn and horses.

Alright, ready for the shoot.  And off we go!
The Nikon D500, Nikon 18-140, Tokina 11-16 and Tamron 70-200 were used here along with the Nikon SB speed lights and Opteka grids.  In some later shots, we used the white panel of the reflector and the diffuser panel.  We will go into more detail in each of the shots - just check out the data underneath each.

Nikon D500 / Tamron 70-200/2.8 VC / Nikon SB-600
1/800, ISO 100, F/5.6 @75mm - on axis fill flash @ -1.0
Model: Amanda
Nikojn D500 / Tamron 70-200/2.8VC  /  Nikon SB-26, SB-28
1/250, F/4, ISO 100 @70mm - SB both gridded, one on face, one on graphic on tank top
Model:   Kyle
Nikon D500  /  Nikon 18-140
1/400, f/5.6, ISO 100 @40mm
Model:  Josh
Nikon D500  /  Nikon 18-140  /  Nikon SB-26
1/250, f/5.6, ISO 100 @45mm
Used the diffuser panel to cut the hard light from camera left,
then filled in the hat and back with SB speed lights.
Model:  Amanda
Nikon D500  /  Nikon 18-140  /  SB-600
1/1250, f/4.2, ISO 100 @35mm
SB speed light low and to camera left.
grid skimmed the gun then on to models face
Model: Josh
Nikon D500  /  Tokina 11-16/2.8
1/400, f/5.6, ISO 100 @11mm
Reflector to camera left to bring up shadows.
Model: Kyle

Once wrapped up at the outdoor location, we head to the gym location.   My lighting is going to be similar, but the vibe is a bit different here.  While the outdoor location provided us with a gritty, earthy and relaxed feel - the gym gives us an intensity and a slightly different gritty feel.   The energy is amped, and the models are no strangers to the gym.  You can see almost immediately ion the shots the concentration and more serious tone.

The results:
We were closer quarters here and the ambient light was much dimmer.  The D500 is great, but the APS-C sensor would give us a lot less room(proximity) to work with inside the gym.  Breaking out the D700 and the 24-70 for the entirety of the gym.  Nikon SB's still employed.  Depending on the shots, we still used the grids, but other shots benefited from bouncing the SB off the back wall and getting more of a flood of light.

Nikon D700 / Nikon 24-70/2.8 / Nikon SB-26
1/250, f/5.6, ISO 800 @62mm
Double exposure created in Nik Analog Efex
Model: Jeramy

Nikon D700 / Nikon 24-70/2.8 / Nikon SB-28
1/250, f/5.6, ISO 800 @52mm
B&W processing in Nik Silver Efex
Model: Jeramy

Nikon D700 / Nikon 24-70/2.8 / Nikon SB-28
1/250, f/5.6, ISO 800 @52mmImage flipped in post so graphic in mirror is not reversed
Model: Jeramy

Nikon D700 / Nikon 24-70/2.8 / Nikon SB-28, SB-26
1/250, f/5.6, ISO 800 @56mmone speed light bounced off back wall/ceiling
other speed light gridded and run along the back bottom row of dumb bells.
Post processing Nik Silver Efex
Model: Jeramy

Nikon D700 / Nikon 24-70/2.8 / Nikon SB-28
1/250, f/5.6, ISO 800 @70mmspeed light bounced over my head on back wall/ceiling
Model: Amanda

Nikon D700 / Nikon 24-70/2.8 / Nikon SB-28, SB-26
1/320, f/5.6, ISO 800 @24mmone speed light bounced on wall to the left
other speed light just to camera left to light t-shirt graphic
Post processing done in Lightroom CC
Model: Josh

Nikon D700 / Nikon 24-70/2.8 / Nikon SB-28
1/200, f/5.6, ISO 800 @29mmspeed light bounced off wall behind camera
Model: Kyle

Nikon D700 / Nikon 24-70/2.8 / Nikon SB-28, SB-26
1/200, f/5.6, ISO 800 @56mmone speed light bounced on wall to camera right
other speed light gridded and shot low to illuminate foot area
Model: Josh

Nikon D700 / Nikon 24-70/2.8 / Nikon SB-28
1/200, f/5, ISO 800 @70mmone speed light bounced off wall/ceiling camera right
Model: Kyle


Saturday, December 19, 2015

Dealing With Those Nikon Reds - A Holiday Special

Here is a little quick tip for you this holiday season.   The bonus gift is that you'll get something that is useful all year long as well.

If you've ever shot with a Nikon camera before, you'll know that it is very easy to blow out the red channel in your images.  What that means is that the reds can tend to be over saturated and over luminated.  It gives you something like you'll see below:


Lovely image of this little boy telling Santa what he wants for Christmas, but you'll notice that Santa's suit is a little weird looking in the red parts.  Today, we are going to look at a quick way to rectify this in either Lightroom or Adobe Camera RAW.  Other post processing software may also be able to adapt to this process as well.

Shoot in RAW if you can.  You'll have more latitude in processing.  If not, you may still be able to get this to work quite well with your JPG files.

Your RAW image should look something like this when you first begin:


The colors are very muted and the image is low contrast.  So the first thing you'll want to do is start bumping up the contrast, exposure if necessary (hopefully you got the flashes at the proper power to make this a non-issue), vibrance, sharpening, etc.

Problem is, if you use the TONE controls, they work on an image in an overall way, affecting everything.  So in order to get the boys shirt/jeans and the background to a proper level, you end up having the blown out reds like you see in the first image we posted.  So, here is where the fix comes in.

Scroll down to the section HSL/Color/B&W.  Select the word Color.  You'll see a box like the one below.


After I got all the other colors the way I wanted them, I can now use this to fix Santa's suit color.

Each one the colored boxes isolates the color properties in the image.  It no longer will affect every color in the image.  So, I clicked the far left box, which is the Red box.  I bumped the Saturation down to -10 and the Luminance down to -40.  The real game changer here is Luminance.  Once you start sliding that down, you'll see the reds immediately start to lose that blown out look, the detail will return.

That gives us our finished image, which I've provided below:


There are other methods of dealing with this, but I found this one to be one of the quicker ways to do it.

My setup was 2 strobes (Alien Bee B400) one to camera right and above the subjects, and a fill/hair light to camera left parallel the where Santa was sitting.  Power on main light was 1/4, fill light was 1/16 power.

Nikon D700 and Nikkor 24-70/2.8G lens was used.  Settings were 1/60 @ f/5.6 ISO 200 WB set to flash in camera.

Here are the other settings I used in Lightroom.