Friday, September 8, 2017

A Trip to Yellowstone National Park - Photo and Hiking Gear

Being a photographer, of course I want to bring my camera gear.  We must also temper that with the fact that we will be doing a lot of hiking as well.

I went out and looked at others photos of Yellowstone just to get an idea of the sites I might want to capture, the terrain we might face and used those as a guide on what to bring.

Hiking Gear
First and foremost, the hiking gear needed to be correct.   If I cannot get to where I want to be, then no amount or photo gear would matter.

Backpacks were a must and I needed 2 of them.  The thing is, that my backpack had very different requirements for me than my wife did for her.  She is very much the pure hiker, happy to take a shot or 2 with her cell phone.  She is much more about the hike than the pictures.  On the other hand, I am about getting to that grand place for the great shot.

My wife's pack was the Kelty 3100 RedWing.  The Kelty is nice because it has a plastic internal frame system to help distribute any kind of load.

My pack was the Mindshift Ultralight 36L.


In our packs, we both carried the following:

Camelbak Antidote 3 liter system
Terra Hiker Rain Poncho
Coleman Camp Toilet Paper
Various high energy snacks
Flashlight
Personal first aid kit
pencil and paper
extra socks
hat (sun shading and winter caps - temps early morning and late in evening can drop down into the 40F range)
Hooded sweatshirt
Lifestraw Water Purification system
Ibuprofen
Tylenol
allergy medications
a deck of playing cards (for boredom and for potential magic tricks)

I carried additionally the following:

Garmin Oregon 600t GPS system with a bunch of rechargeable AA batteries.

Maps of the parks and hiking trails.

My wife took an Anker 30,000mah charger for our phones.   Cell service is spotty at best through most of the park, but in case of emergency, it would be great to have the power available if need be.

Since we were going to be hiking some potentially long trails and they could be quite far away from some of the more populated centers, I rented a canister of bear spray.

For clothing, we went more with cotton tees and the moisture wicking style of shirts.  I favored more of a cargo khaki short, while the wife went with capri style pants.

I really like the Merrel brand of hiking boots, so my tried and trusted.  Mine are similar to these MOAB 2 mid hikers.  I did have to admit that they were worn out after this trip and did not make the return.

Before trusting any of this hiking gear, the wife and I hiked locally with full packs and all the gear we would have on us in Yellowstone. The last place you want to find out that something doesn't work, rubs you the wrong way or is just plain junk is out on a trail you are not familiar with thousands of miles away from home.  Months before our trip, we took several mile long hikes through various terrains, taking the time to learn our gear and treat the local trails just as we would the Yellowstone trails.    We did quite well, honestly, with only a few tweaks required.

Camera Gear
I wanted to be able to go light, but also wanted to have enough gear with me to be able to handle just about everything I might run into.

Supporting Systems
I thought about a tripod, but decided against it.  I did not want to have to deal with it honestly.  For the type of images that I wanted to shoot, I could not really see if being that much of a benefit to me.

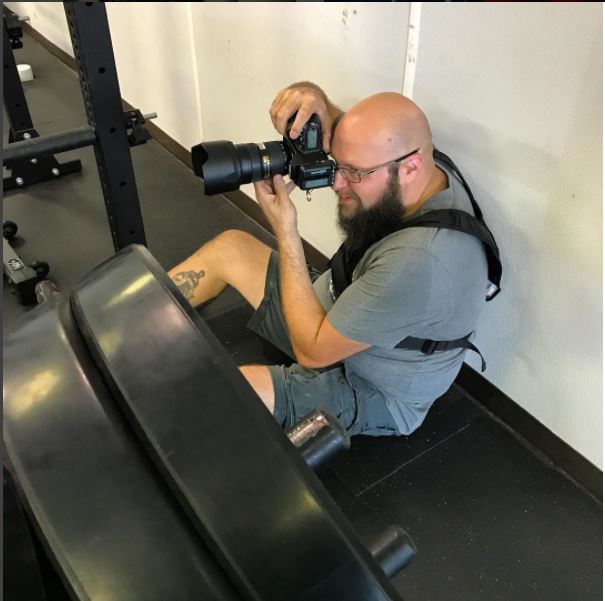
Supporting my camera gear while on hikes was an important consideration.  I already had the Black Rapid system.  It is a fine system, but with the active hiking and the way the back pack fit, I was not satisfied with the Black Rapid for this application.   I purchased the Cotton Carrier system.  This placed the camera directly on my chest and it put it out of the way of the back pack straps.  It was perfect for my trip.  It too was purchased and tested months before the trip began.


I run 2 camera systems.  Micro Four Thirds as well as Nikon.  While both are excellent and have their benefits, the Nikon system came with me.  Why?  There are several factors.  Dynamic range was a concern of mine, as was an all day battery life and rugged weather resistance.

I also auto focus fine tuned all my lenses, so issues with AF accuracy were not a concern.

Camera Kit
The camera kit that came with me was as follows:
Nikon D500 + 3 batteries

Nikon 300/4E PF

Nikon TC14E-III teleconverter


Nikon 18-140/3.5-5.6 VR


Tokina 11-16/2.8


This all fit perfectly in the camera compartment of the Mindshift backpack.  I had no complaints at all of the gear I took.  The Tokina 11-16 is a gem of a lens and worked great for those times when you were locked in close to a thermal and could not move backwards to get a wider field of view.
Here is just one example of  when the wide Tokina helped me get an image without the need of using any kind of post processing stitch:

1/50, f/11, ISO 100 @ 12mm
Morning Glory Pool
The Nikon 18-140, while not the equal to the Tokina or the Nikon 300/4 in IQ, was a great, all purpose lens for the bulk of the trip.

The Nikon 300/4 with the teleconverter, APS-C sensor and 1.3X crop mode gave me enough reach for the majority of images I wanted to capture long ways out.
Here is an example of the reach the 300mm + TC and APS-C sensor gave me:
1/640, f/11, ISO 1000 @ 420mm - Nikon 300mm + TC14E-III + APS-C sensor ~ 630mm field of view equivalent
This all worked out excellently for both of us.  We struck a great compromise between convenience, weight and space.

Whenever going on long trips like this, I like to have an image backup solution.  I've already gone into some detail about that in a previous posting, which can be found here:
Light, Low Cost Image Backup Solution.

Wednesday, September 6, 2017

A Trip To Yellowstone National Park - Trip Planning

After we set our sites on a target we rarely miss.  Yellowstone National Park (YNP) was in the cross hairs, so the planning was in full force.

My wife being a much better planner of travel than me, handled the flight details, lodging and rental vehicles.

Budget
We discussed a budget for the trip.  We wanted to be roughly around $3000USD in total for lodging, travel and car rental.

Flights versus Driving
Our vacation time was limited to 7 days and we even planned the trip around a holiday weekend(Aug 26 - Sept 2).
Researching travel options showed that flights from our location would be the best option.  A flight from John Glenn International Airport (KCMH) to Yellowstone International Airport (KCOD) would take around 5.5 hours, while driving would yield a 24 hour trip time.


There were 2 main choices from our location: Delta and United Airlines.  Both flew from John Glenn into Denver, then a connecting flight from Denver to Cody.  United won out for us.  We decided to spring for first class.  I'm very glad we did.  Almost 4 hours in the air, it was nice having the extra leg room and the enhanced services.  Flight costs were $1600 for 2 round trip tickets.

Lodging
Our first look into lodging was staying in a resort within the park itself.  Possibly at Mammoth or Old Faithful.  Those proved to be cost prohibitive for our budget.  Lodging cost alone in those places would have almost exhausted our budget.  One of our favorite ways of securing a place to stay is using the mobile app called Airbnb.  If you've never used it, let me tell you that it is one of the most convenient ways of finding a place to stay.  Since using the service, we have never stayed in a hotel since.  I'll not get into the details of it all, but look it up on your smart phone and see the cost savings as well as the convenience/quality of the lodging.

Using Airbnb, we found a great one bedroom place in downtown Cody, WY.  From here, it would only be a 50-60 minute drive to the East Entrance of Yellowstone.  Cost of rental for the week was $800

Why so far away from the entrances?   This is my thought process.  Cody, WY has a lot to offer.  Not being familiar with the region, we were unsure of the weather.  We wanted to make sure that we had activities and entertainment for the bad weather days.  Another consideration is fatigue.  We have had times when you try and pack too much into a day and then you get tired from all the boping about you did.  While possible to run through a lot of YNP from a car, we wanted to be able to experience quite a bit more, so plans for hiking could wear you out.  Having a backup plan would be a good idea.

Vehicle Rental
We were able to get a package deal with our flight from United.  $380 got us a Toyota Camry with 2100 miles of use for the entire week.

A lot of people think that you might want a truck of some kind.   I would consider it a "nice to have" not a necessity.  We did quite well everywhere we went for the whole week.  Since we were driving almost 100 miles per day just too and from the park, having the more fuel efficient car was also a bonus.

Viewing Plan
As hinted to in the first post, we wanted to have an idea of what we wanted to do, but not be so planned out that we scheduled a specific when.

I downloaded a map from the YNP website that had an overview of the park.   Labeled all the entrances, the grand loop and most of the major stops along the way.   From that I made a list of the must see areas.  Old Faithful, Mammoth, Canyon Village, Mt. Washburn just to name a few.

Being an avid hiking family, we wanted more detail on the trails we were going to be exploring.  A book that helped a lot in the planning process was Top Trails Yellowstone and Grand Tetons National Park: 46 Must-Do Hikes For Everyone by Wilderness Press.  It lays out most of the major trails, rating them for difficulty, use, access.  It also gives you details on length in miles as well as trail types, such as loop, one way or out and back.  This resource helped us pick some great hikes and we could pre-plan them to our desired skill level.  We chose to stick with ones that were 5 miles and under.

I also picked up the National Geographic YNP regional topo maps.  I thought those wold be a good, light weight and small addition to the pack for hiking.

With all that down and out of the way, all that was left was the waiting for the day to arrive.  Our next post will cover the photography and hiking gear.  Stay tuned and enjoy!

Monday, September 4, 2017

A Trip To Yellowstone National Park - Introduction


This is a bit of a different post for this site.  It is a bit more in depth, but I thought that I might help others through this process.  I did a lot of research and found quite a few helpful sites and past adventurers to the park.

Even with that there were some things lessons learned to go along with the awe to be found there.

What I would like to do is write up a series of posts to not only chronicle the trip, but to also share my thoughts on the planning process as well as any lessons learned.  Right off the bat, I want everyone to know that there was nothing so horrible that would deter me from returning.  On the contrary, my wife and I found the entire experience much better than expected.

Here is an outline of what I plan to cover:

  • Trip planning
    • Budget
    • Flight
    • Accommodations
    • Rental Vehicle
    • Viewing Plan of the Park
  • Gear
    • Photo Gear
    • Hiking Gear
  • Traveling To The Park
    • Entrances
    • Timing
  • Seeing The Sites
    • Time of Day
    • Weather and Environmental
    • Stuff Beyond Yellowstone
  • Lessons Learned
    • Gear/Supplies - what was missing?
    • Climate - under estimating the climate and landscape (from an Ohio perspective)
    • Estimating your capabilities
    • Expectations on the sites
    • The People - staff and visitors
There may be more information than that, but this is going to be the minimum.

Here, I will start with an introduction of sorts.  For that, the best place to start is the beginning.
For 13 years, our family has gone on vacations almost annually.  Up until 2017, every major trip has been to a coastal location.  We've been to New York City, Virginia Beach, Sandbridge, Kitty Hawk, Kill Devil Hills, Nags Head, Orlando, Los Angeles, Boston, Glouster and San Diego.

My wife approached me with the idea that I could pick the destination of our trip for 2017.  No questions - my total choice.   That is a lot of pressure!   This proposition was made to me early in 2016.  I had quite a few places in mind.  Never been to northern California and have always wanted to visit San Francisco.  Yosemite National Park has always been on the short list.  Texas has always been in my thoughts as well with its larger than life people and grand history.  I have some work colleagues that have been to Yellowstone, Grand Tetons and Glacier National Parks and rave about them.   But what about Alaska?   I've always wanted to go there too.  Take a cruise through the north, see the ice, experience the wild tundra, so to speak!   Even going a bit more tame, visit Canada.   I've thought going to Toronto or Calgary might be a great experience.

The more I thought about it though - the more that Yellowstone kept picking at me.  The amount of sites, the fact that it is the first US national park and the world's first national park just had me think that that this was a great place to start off a non-coastal adventure!

Once locked in to that location - the trip process began!

I really hope that you enjoy this series, from a story perspective as well as from an informational/trip planning perspective.

More to come!  Keep your eye on the site for future posts.

Monday, August 21, 2017

American Monster Photo Shoot

Nikon D700 / Nikon 24-70/2.8 / Nikon SB-28
1/320, f/5.6, ISO 400 @70mmgridded speed light just below camera on lens axis

It's always a pleasure when you get to work with great people.  Working with Derrick Smith from American Monster has been a pleasure for us.  BLP was asked to come in and get some marketing photos for social media and the company website.

I thought I'd take you through the process.

Derrick had been familiar with my work from other events that we've shot like editorial work from the Arnold Fitness Expo, our portrait work and street photography.  

Derrick already had the models in mind he wanted to use, so that was not something that BLP needed to do.    That is not always the case, as there are times when the client has a vision, but no models.  If the models had not already been procured by American Monster, we could have used places like Model Mayhem or reached out on social media to find the talent.

Just wanted to give a shout out to the models:

Josh and Amanda Salley, Kyle Smith and Jeramy Weiss.

Image © Derrick Smith / American Monster
We met a few times prior to the shoot to discuss what we wanted to achieve as the end goal.  Derrick is a great photographer and videographer in his own right, but he decided that he would much rather hand the reigns over to me to get the shots and he would take on the role of the artistic director for the shoot.   At the pre shoot meetings, the goal was to get some environmental portraits and scenes, not too posed or staged...with a bit of an edge to them without looking over processed or cartoony.   A hint of grit and grunge, if you will.

Image © Derrick Smith  /  American Monster
Location is important, and there were 2 for this shoot.  The first being an outdoor oasis, just a 25 minute drive from our home location.   We had farmland, pond, open fields...a lot to choose from.   The second location was inside a gym.

So, we have the theme, the location....now we need to determine how we are going to get the look we want.

Image © Derrick Smith / American Monster
Sometimes you gotta put your back against the wall and get low.

Going back to my office, I think about how I want to do it.   Shooting is going to start at 9am, so we still have a good directional light.  If we are backlit, we will want to have some fill light - better bring the off camera flash!    I don't want a soft light, though - so I'm thinking bare light, grids or even a ring light type effect.

Image © Derrick Smith / American Monster
Use what is available to you.  Create a large softbox by bouncing off the back wall and ceiling!
With that tight of a flash beam, though, I'm thinking 2 lights - one key light for the subject and one auxiliary light source for the apparel logos.    Reflectors too...bringing those...they are invaluable!!

Here is the gear list for those interested:
Nikon D500
Nikon D700
Nikon 24-70/2.8 AF-S
Tamron 70-200/2.8 VC
Tokina 11-16/2.8
Nikon 18-140/3.5-5.6 AF-S VR
Nikon SB-26 and SB-28
2 light stands
Opteka 1/4" and 1/8" honeycomb grids
RadioPopper TX/RX (Nano) wireless trigger system
Frio Cold Shoes
Interfit 5-1 fold up reflector/diffuser

Post processing is something I highly believe in.   Some people feel that straight out of camera is the way to go.  If I were shooting a news piece or editorial work, then I'd leave them largely untouched.  In this shoot, we are looking for not only a representation of the products, but also a style to the images.

99% of my post workflow is done in Lightroom.   I also use some plug-ins from On1 and Nik.

My flow goes as follows:
1)  Run all the images through my Nikon Lightroom preset as a base.
2)  Spot check each image to tweak the exposures
3)  Do any cropping I might deem desirable.
4)  Run the images through On1 Effect 2017 (these color images were run through the "Kryptonite" preset and then tweaked)
5)  For select images, I may also run them through a monochrome processing.  For those, I used Nik Silver Efex Pro "film noir harsh" or the On1 Effects 2017 black and white presets of "Kodak Panatomic 32" or "City Streets" - and as always, tweak as necessary.

Luckily, all these tools have a batch processing features so I don't have to touch each and every one.

First thing I do once on location is start scouting for shooting locations.  The property is expansive, but the first thing that hits my eye is this tree with small leaves and  that "weeping willow" style branches.  Sorry to the tree people out there - I don't know the names of my trees very well.  lol.  The morning sun is hitting it in such a way that it is providing a great backdrop that will make the clothing the models are wearing stand out.  

An expansive pond with lots of interesting props all around can be used as well...then we have the farm-esque side of the property with the iconic white fence, red barn and horses.

Alright, ready for the shoot.  And off we go!
The Nikon D500, Nikon 18-140, Tokina 11-16 and Tamron 70-200 were used here along with the Nikon SB speed lights and Opteka grids.  In some later shots, we used the white panel of the reflector and the diffuser panel.  We will go into more detail in each of the shots - just check out the data underneath each.

Nikon D500 / Tamron 70-200/2.8 VC / Nikon SB-600
1/800, ISO 100, F/5.6 @75mm - on axis fill flash @ -1.0
Model: Amanda
Nikojn D500 / Tamron 70-200/2.8VC  /  Nikon SB-26, SB-28
1/250, F/4, ISO 100 @70mm - SB both gridded, one on face, one on graphic on tank top
Model:   Kyle
Nikon D500  /  Nikon 18-140
1/400, f/5.6, ISO 100 @40mm
Model:  Josh
Nikon D500  /  Nikon 18-140  /  Nikon SB-26
1/250, f/5.6, ISO 100 @45mm
Used the diffuser panel to cut the hard light from camera left,
then filled in the hat and back with SB speed lights.
Model:  Amanda
Nikon D500  /  Nikon 18-140  /  SB-600
1/1250, f/4.2, ISO 100 @35mm
SB speed light low and to camera left.
grid skimmed the gun then on to models face
Model: Josh
Nikon D500  /  Tokina 11-16/2.8
1/400, f/5.6, ISO 100 @11mm
Reflector to camera left to bring up shadows.
Model: Kyle

Once wrapped up at the outdoor location, we head to the gym location.   My lighting is going to be similar, but the vibe is a bit different here.  While the outdoor location provided us with a gritty, earthy and relaxed feel - the gym gives us an intensity and a slightly different gritty feel.   The energy is amped, and the models are no strangers to the gym.  You can see almost immediately ion the shots the concentration and more serious tone.

The results:
We were closer quarters here and the ambient light was much dimmer.  The D500 is great, but the APS-C sensor would give us a lot less room(proximity) to work with inside the gym.  Breaking out the D700 and the 24-70 for the entirety of the gym.  Nikon SB's still employed.  Depending on the shots, we still used the grids, but other shots benefited from bouncing the SB off the back wall and getting more of a flood of light.

Nikon D700 / Nikon 24-70/2.8 / Nikon SB-26
1/250, f/5.6, ISO 800 @62mm
Double exposure created in Nik Analog Efex
Model: Jeramy

Nikon D700 / Nikon 24-70/2.8 / Nikon SB-28
1/250, f/5.6, ISO 800 @52mm
B&W processing in Nik Silver Efex
Model: Jeramy

Nikon D700 / Nikon 24-70/2.8 / Nikon SB-28
1/250, f/5.6, ISO 800 @52mmImage flipped in post so graphic in mirror is not reversed
Model: Jeramy

Nikon D700 / Nikon 24-70/2.8 / Nikon SB-28, SB-26
1/250, f/5.6, ISO 800 @56mmone speed light bounced off back wall/ceiling
other speed light gridded and run along the back bottom row of dumb bells.
Post processing Nik Silver Efex
Model: Jeramy

Nikon D700 / Nikon 24-70/2.8 / Nikon SB-28
1/250, f/5.6, ISO 800 @70mmspeed light bounced over my head on back wall/ceiling
Model: Amanda

Nikon D700 / Nikon 24-70/2.8 / Nikon SB-28, SB-26
1/320, f/5.6, ISO 800 @24mmone speed light bounced on wall to the left
other speed light just to camera left to light t-shirt graphic
Post processing done in Lightroom CC
Model: Josh

Nikon D700 / Nikon 24-70/2.8 / Nikon SB-28
1/200, f/5.6, ISO 800 @29mmspeed light bounced off wall behind camera
Model: Kyle

Nikon D700 / Nikon 24-70/2.8 / Nikon SB-28, SB-26
1/200, f/5.6, ISO 800 @56mmone speed light bounced on wall to camera right
other speed light gridded and shot low to illuminate foot area
Model: Josh

Nikon D700 / Nikon 24-70/2.8 / Nikon SB-28
1/200, f/5, ISO 800 @70mmone speed light bounced off wall/ceiling camera right
Model: Kyle